Chokuretsu ROM Hacking Challenges Part 4 – Event File Excavation
In my first few posts, I explained how I figured out how to extract files from the different Chokuretsu archives. This post is the start of the next series where we delve into how I reverse-engineered the contents of those files for the purpose of translating the game. Today, we’re covering the backbone of the game’s script – the event files. This is intended to serve as both an explanation of how I reverse-engineered these files and an introduction to trying to reverse-engineer files.
A Very Good Place to Start
At the very beginning of my work on the event files, I had cracked the compression algorithm, but not the archives. This meant I was able to view the files but not yet reinsert them into the game. That’s okay, though! A great place to start when looking at a file is to… well, look at it. Specifically, let's crack open the hex editor and see what we can find.
So this is the first event file in the game (technically it’s the second chronologically and the 360th in the archive, but don’t worry about that right now):
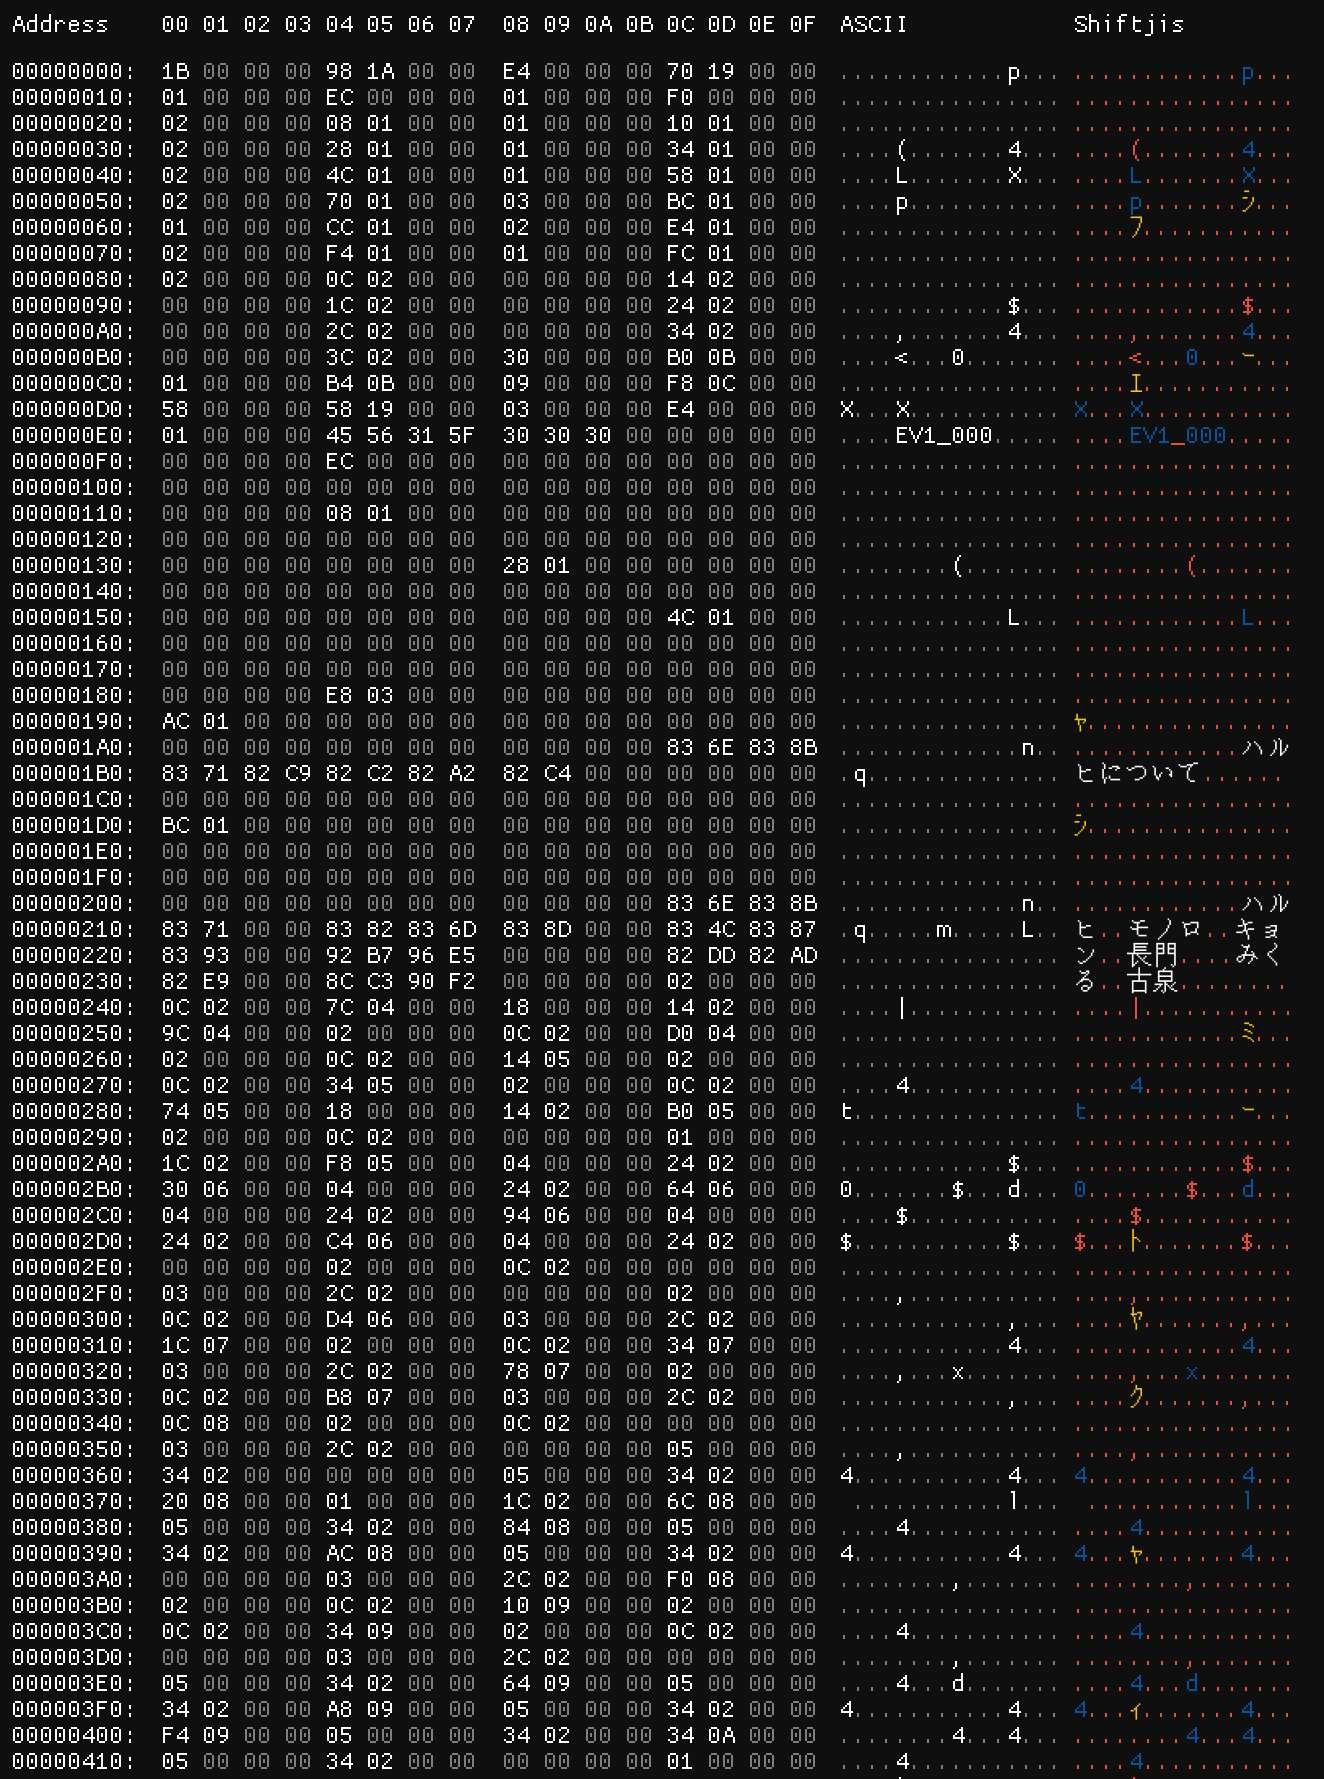

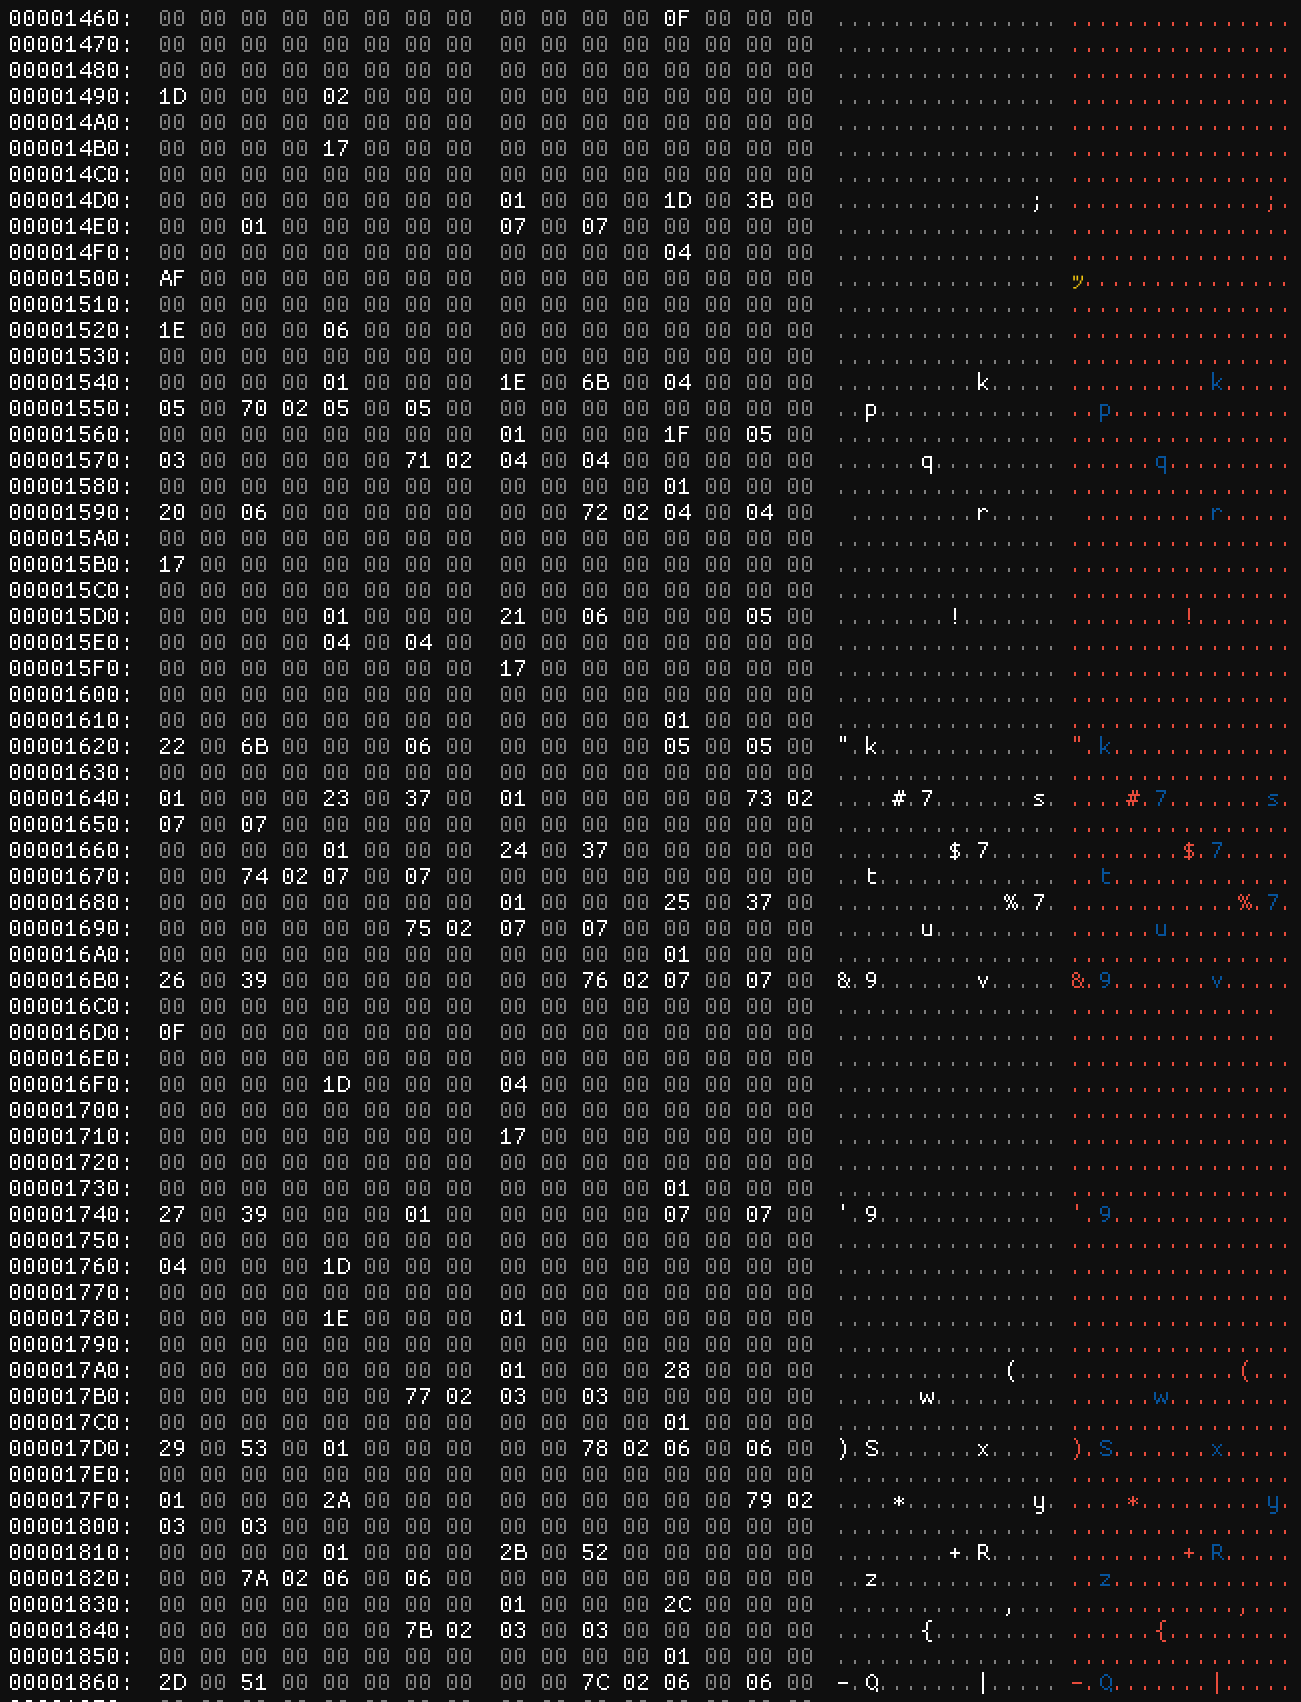
That’s it in all its 7.06 KiB of glory. I’m reproducing the entire file here for two reasons – one, so we can reference these images in context (I’ll make sure to mention the number you see above each screenshot when referencing something in that image), but also two, so that you can see how intimidating a file like this can look at first glance. That’s a lot of data! But not to worry – we can figure it out!
As I mentioned, the above images are screenshots of a hex editor. In case you’ve forgotten how hexadecimal works, here’s a quick summary from the compression blog post:
Hexadecimal is also called base 16 – while we normally use decimal (base 10 – i.e. 0, 1, 2, 3, 4, 5, 6, 7, 8, 9) and computers use binary (base 2 – i.e. 0, 1), programmers often use hexadecimal because it allows us to represent a single byte in two characters. When writing numbers, to distinguish the base we often use 0x as a prefix for hex numbers (0x17 is 23 in decimal) and 0b to represent binary numbers (0b0000_0100 is 4 in decimal).
A hex editor, therefore, is a program to view and edit the hexadecimal representation of files, meaning it allows us to take a peek and and even modify the raw file data. Neat!
It’s also worth noting that in the past few posts, I’ve used CrystalTile2 for screenshots. I’ve since discovered ImHex which I think is fantastic. While it’s not what I used while working on this, I’m going to use it for screenshots anyway. I mention this in part because you might have noticed that there’s two columns of text to the right of the hexadecimal – one in gray/white and one in red/blue/gold. The gray/white one is the hexadecimal interpreted through the ASCII encoding while the red/blue/gold column is interpreted through the Shift-JIS encoding. If you recall from the compression blog post:
You might be familiar with ASCII, the most basic of encodings – each letter in the alphabet is represented by a single byte. This game uses an encoding called Shift-JIS, which is how Japanese was represented prior to the advent of Unicode.
So ImHex allows us to see both encodings at once in addition to a bunch of other great features, which is why I made the switch!
Pointers Point the Way
When you’re lost, you might ask someone for a pointer, and indeed that’s also what we’re going to look for here. In case you’re not following, I’ve copied this passage from the archives blog post:
An address is the absolute location of data in memory. When we set memory breakpoints in the debugger, we use addresses.
An offset is the relative location of data in a file. When we have a single file open in the hex editor, we talk about offsets.
A pointer is a value that points to an address or offset. A pointer to an address might look like an integer with the value 0x0220B4A8, while a pointer to an offset might be as simple as 0x3800. Addresses are used by the program when accessing memory, while offsets are used in files (since they can be loaded into arbitrary locations in memory), so it’s up to the program itself to convert those offsets into addresses.
Why do we want to look for pointers? All files have to have some sort of consistent structure and logic – otherwise, computers won’t be able to read them. Pointers are the way that we imbue that structure into a file – a common pattern is to have a header section at the top of the file that has pointers to important places throughout the file. So let’s start at the top.
First of all, we can see pretty clearly from the spacing of the numbers at the top of the first image (#1) that these are a series of 32-bit integers. How do I know? Well, it’s the spacing. We’ve got one or two bytes of numbers followed by two or three bytes of zeros repeating over and over again. Since a 32-bit integer is four bytes in length, this suggests that we’re looking at a sequence of that type.
Specifically, in the first five lines (or 80 bytes) we have:
| 0x1B | 0x1A98 | 0xE4 | 0x1970 |
| 0x01 | 0xEC | 0x01 | 0xF0 |
| 0x02 | 0x108 | 0x01 | 0x110 |
| 0x02 | 0x128 | 0x01 | 0x134 |
| 0x02 | 0x14C | 0x01 | 0x158 |
Real quickly, if you’re wondering why some of these numbers look like they’re reversed, here’s a refresher from the archive article:
There are two possible ways to store a 16-bit integer, however. For example, take 512 (0x200). You could choose to store that with the most-significant byte first (i.e.
02 00) or with the least-significant byte first (i.e.00 02). This decision is called endianness, where the former is “big-endian” and the latter is “little-endian.” Frequently, the decision is made simply to align with whatever the architecture uses; the DS’s ARM architecture is a little-endian architecture so these files are likely little-endian as well.
Anyway, we’ve got these as integers now. Are any of them pointers?
Immediately we can rule out a few of these. First of all, this file is most likely four-byte-aligned, meaning that data is padded to reach the nearest four bytes. This means that most (if not all) of our pointers are going to end in a multiple of four (0, 4, 8, or C). That first integer, 0x1B, doesn’t match that pattern at all – confirming this, if we go to 0x1B, we end up in the middle of one of our integers.
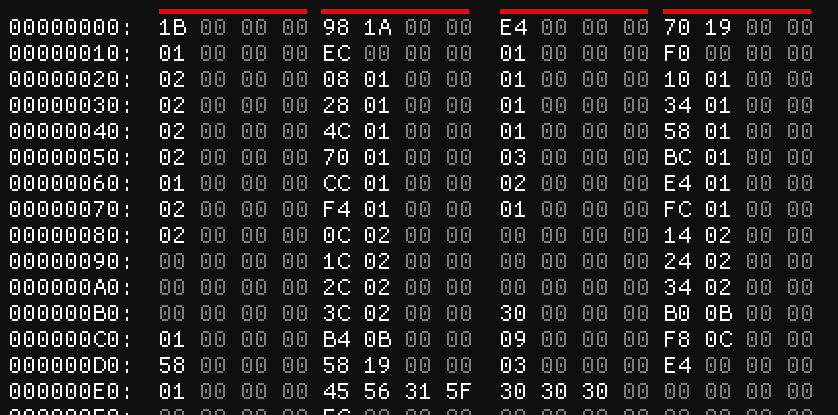
The next number, though, does match this pattern as it ends in a multiple of four – 0x1A98. If we go down to that offset (image #7), we can see…
Again the first number here isn’t a pointer, but all these numbers that follow are! And while we’re here, I have a hunch about this first number – what if it’s the number of integers that follow it? 0x67 is 103. Subtracting the offset of the first integer (0xF4, which is located at 0x1A9C) from the last (0x19E8, which terminates at 0x1C38) and dividing by four (the length of an integer in bytes) gives us (0x1C38 - 0x1A9C) / 4 = (7224 - 6812) / 4 = 412 / 4 = 103! So unless that’s a coincidence, that first number is the number of pointers here at the end of the file. (For convenience, we’re going to call these what I called them – “end pointers”.)
We’ll get back to those – for now let’s return to the top of the file.
The next integer we’re looking at is 0xE4 – this definitely looks like a pointer as well. If we follow it, we can see that it leads us straight to a string: EV1_000.
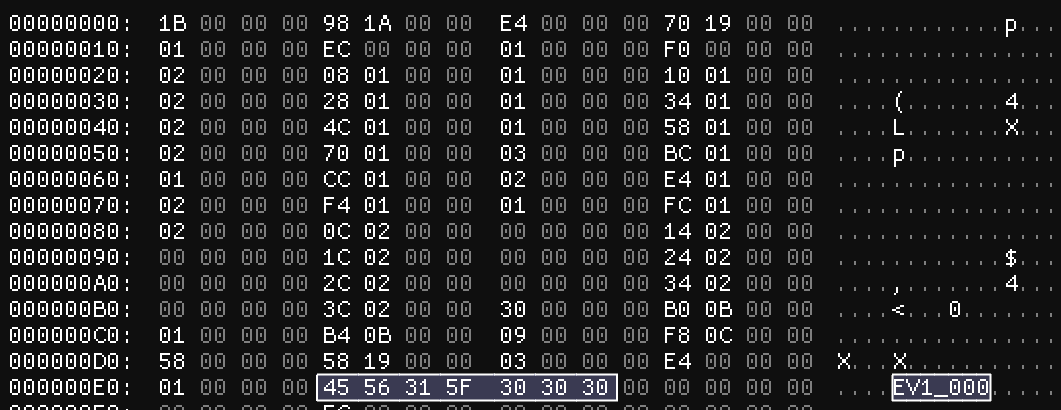
This kind of looks like the title of the file, maybe! Something to keep in mind for later on. Perhaps this second pointer points to the title of the file?
As we go throughout the file, we should, as always, be attempting to construct a representation of it in code. So let’s start that now!
public class EventFile
{
public int Unknown00 { get; set; }
public int EndPointersPointer { get; set; }
public int TitlePointer { get; set; }
}
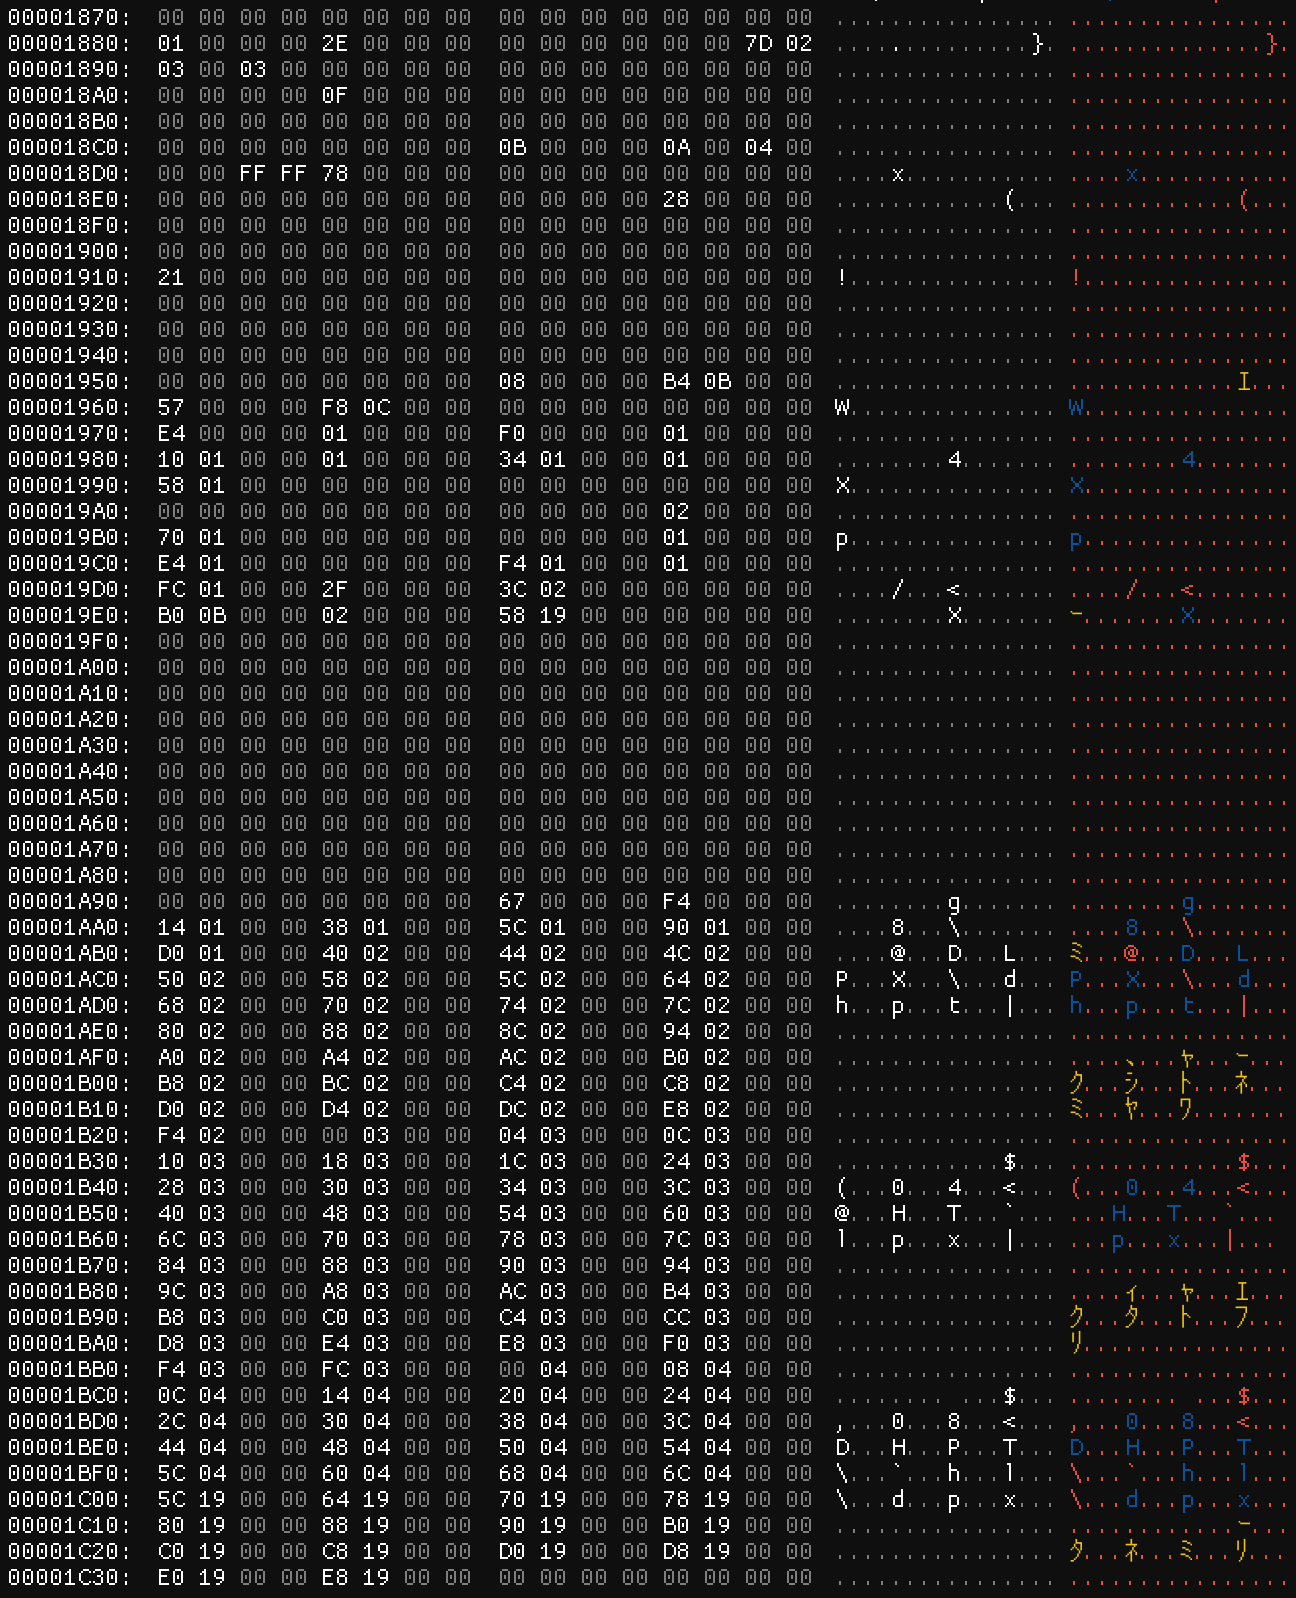
This is a good starting point, but it will need some tweaking as we go. In any case, let’s continue: as we move on to the fourth integer at the top of the file, we have yet another pointer: this time, it’s to lower down in the file (image #7).
No strings of any kind down here – just a bunch of numbers and a lot of them seem to be zero for some reason. Some of these might be pointers, but it’s hard to tell at the moment. When you encounter something you don’t understand, sometimes it’s best to just keep moving on until you find something you can latch onto rather than going on a series of wild goose chases.
So back to the top. The next number is 0x01 – definitely not a pointer. After that, we have 0xEC – that points to 00 00 00 00 as well. Hm. Okay, well then we have an 0x01, followed by an 0xF0.

Interesting! Right after 0xF0 at offset 0xF4, there’s an 0xEC – that’s the previous pointer we skipped over! What does that mean? No idea, really. I said it was interesting, not that I understood it.
If we were to go through the rest of the pointers we called out at the beginning, I’d bore you as it continues to have a bunch of 00s followed by brief flashes of pointers that ultimately don’t reveal anything useful (at this point). So let’s talk about the header again – one thing that I’ve noticed is that there’s a pattern of a pointer followed by a non-pointer integer. Perhaps this is a structure of some kind? We know that it stops at 0xE4 because that’s where the title (EV1_000) was. So taking 0xE4 and subtracting 0x0C and dividing by 8 bytes, we get 0x1B. Hey – that’s the first number we saw! So that must be the count of these structures – matching our EndPointers, we can call these FrontPointers (maybe StartPointers would have made more sense but we have to live with my 2021 naming decisions 😛).
So now we can modify our class to look like this:
public class EventFile
{
public int NumFrontPointers { get; set; }
public int EndPointersPointer { get; set; }
public int TitlePointer { get; set; }
public List<int> FrontPointers { get; set; }
public List<byte> Data { get; set; } // We will store all of the file data in here so we can modify it later
}
Follow Your Passion
So we’ve discovered a few things here, but I feel like the trail is starting to run cold by just looking at where these front pointers take us. So let’s try something else. The whole goal here is to be able to modify the dialogue in this scene so we can translate it – so let’s take a look at the dialogue lines and see if we can figure out how they work!
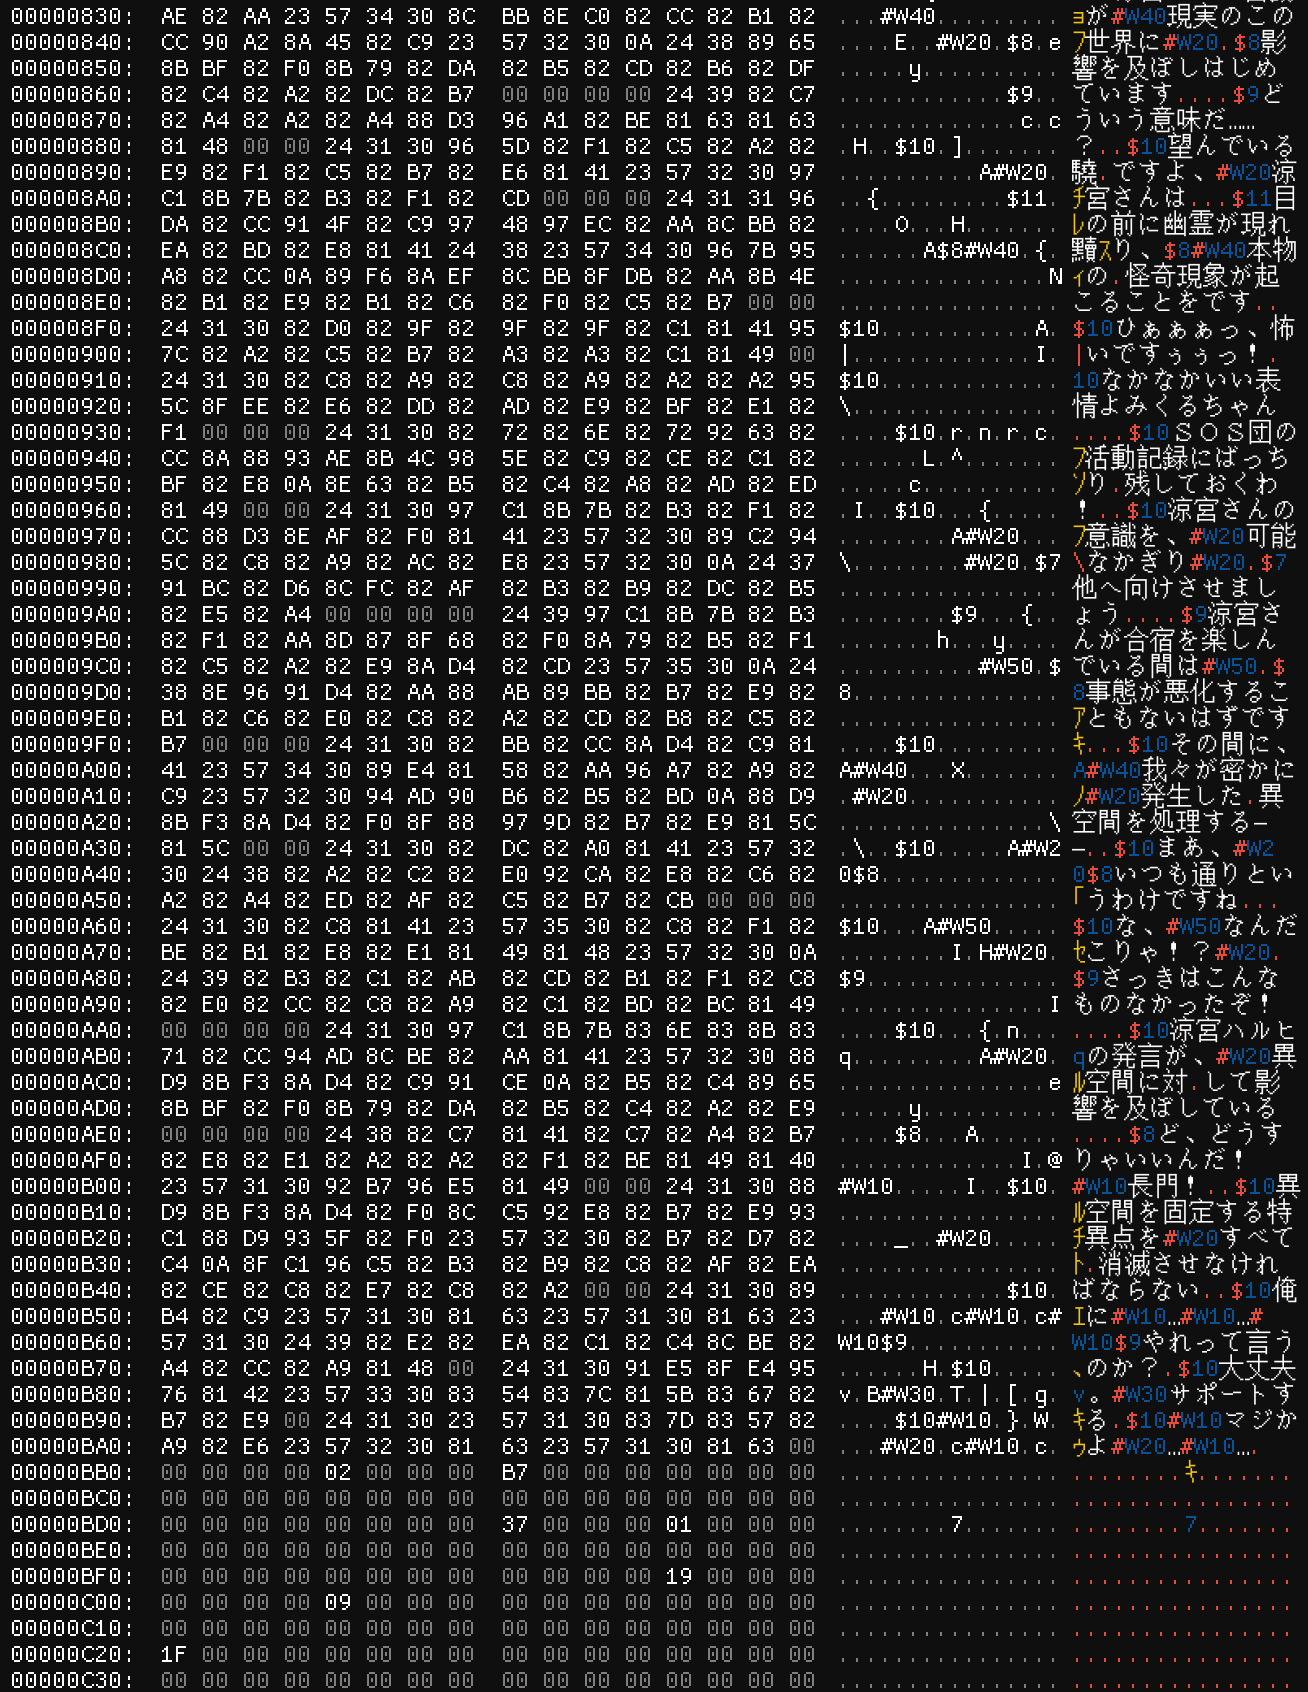
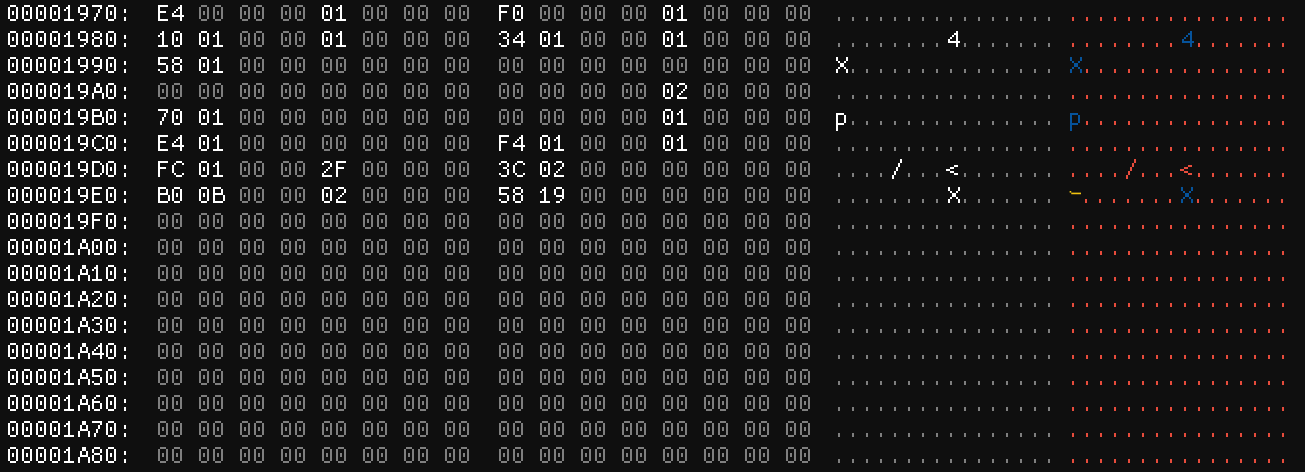
Specifically, we’re going to again focus on pointers and see if we can find any that point to the dialogue lines. So let’s scroll down and find the first dialogue line (image #2) and then search for its offset in the file.

It looks like this first line starts at 0x47C. Searching for 7C 04 yields one hit up at 0x244 (image #1):

The next dialogue line starts at 0x49C and we can see that offset in this screenshot as well at 0x250, which is 12 bytes ahead of where we are now. So perhaps these are 12-byte structures representing dialogue lines! Let’s see if we can find anything representing the structures. Searching for the offset of the pointer to the dialogue line (44 02) turns up one pointer in that end pointers section – interesting! Same thing happens when we search for 50 02. However, there’s some values right before 0x244 as well. If these are 12-byte structures, it’s possible that the dialogue line is the second or third integer in the structure rather than the first. In fact, there are three possibilities as illustrated below:


Therefore, we should try to see if we can find something that points to the beginning of the structure. So let’s try searching for the offset of the first integer, 3C 02 (assuming the dialogue line pointer is the third integer)...
Look at that – we have a reference to it in the FrontPointers at the top of the file! This is getting interesting. For now, let’s jump back to the structures we found and see if we can analyze it to figure out what the other values are.
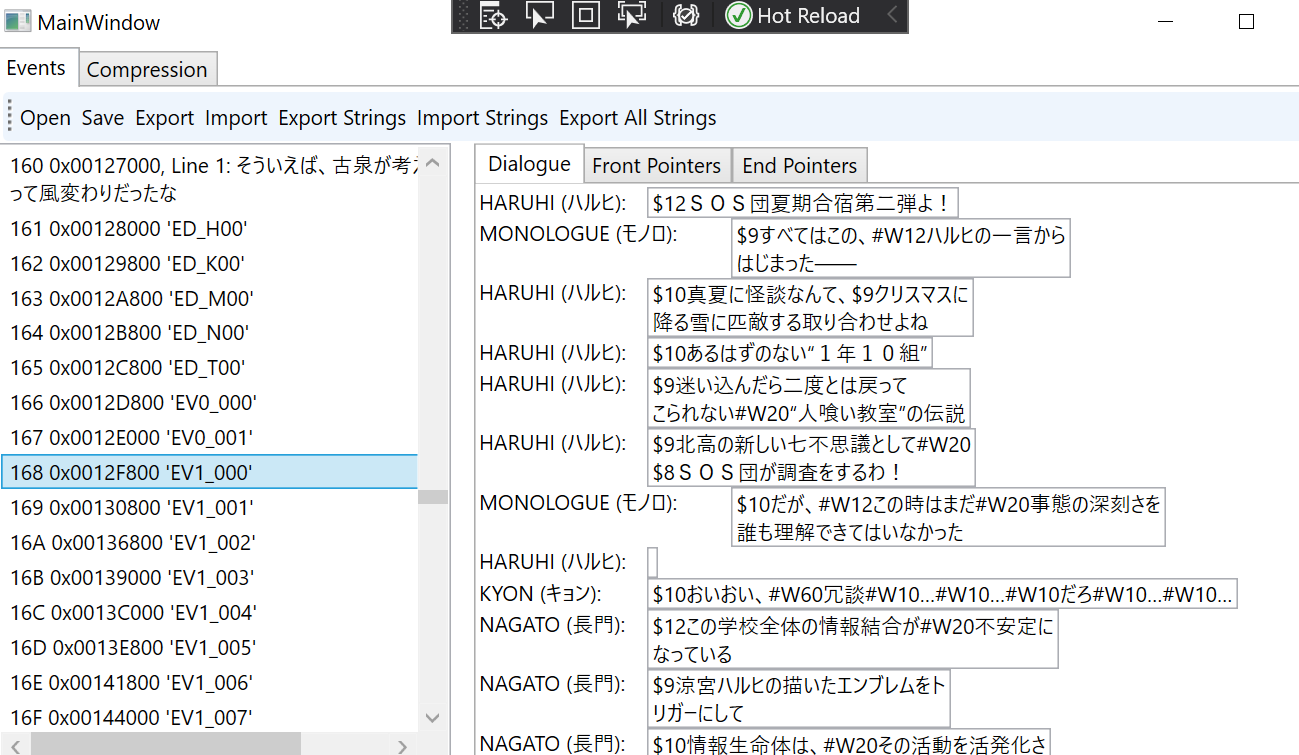
As we saw, each of the structures has three integer values. Let’s map out the first couple of them:
Unknown00 | Unknown04 | DialoguePointer |
|---|---|---|
| 0x02 | 0x20C | 0x47C |
| 0x18 | 0x214 | 0x49C |
| 0x02 | 0x20C | 0x4D0 |
| 0x02 | 0x20C | 0x514 |
| 0x02 | 0x20C | 0x534 |
| 0x02 | 0x20C | 0x574 |
| 0x02 | 0x20C | 0x00 |
| 0x01 | 0x21C | 0x5F8 |
| 0x04 | 0x224 | 0x630 |
| 0x04 | 0x224 | 0x664 |
So the first thing I notice here is that Unknown00 and Unknown04 seem to correspond to each other – or example, 0x020C is always the second pointer when 0x02 is specified in the first column. Looking at the same screenshot from above, we can see what these Unknown04 values point to. Let’s make a quick table – since the values are in Japanese, I’ll provide an English translation as well:
Unknown04 Pointer | Value | English |
|---|---|---|
| 0x20C | ハルヒ | Haruhi |
| 0x214 | モノロ | Monologue |
| 0x21C | キョン | Kyon |
| 0x224 | 長門 | Nagato |
These are all character names! Maybe these control the nameplates? Either way, since they correspond one-to-one with the Unknown00 values, we can guess that they are also related to the speaker of the line in some way. Let’s make a class to represent these values:
public class DialogueLine
{
public int Speaker { get; set; }
public int SpeakerNamePointer { get; set; }
public int DialogueLinePointer { get; set; }
public string SpeakerName { get; set; }
public string Dialogue { get; set; }
}
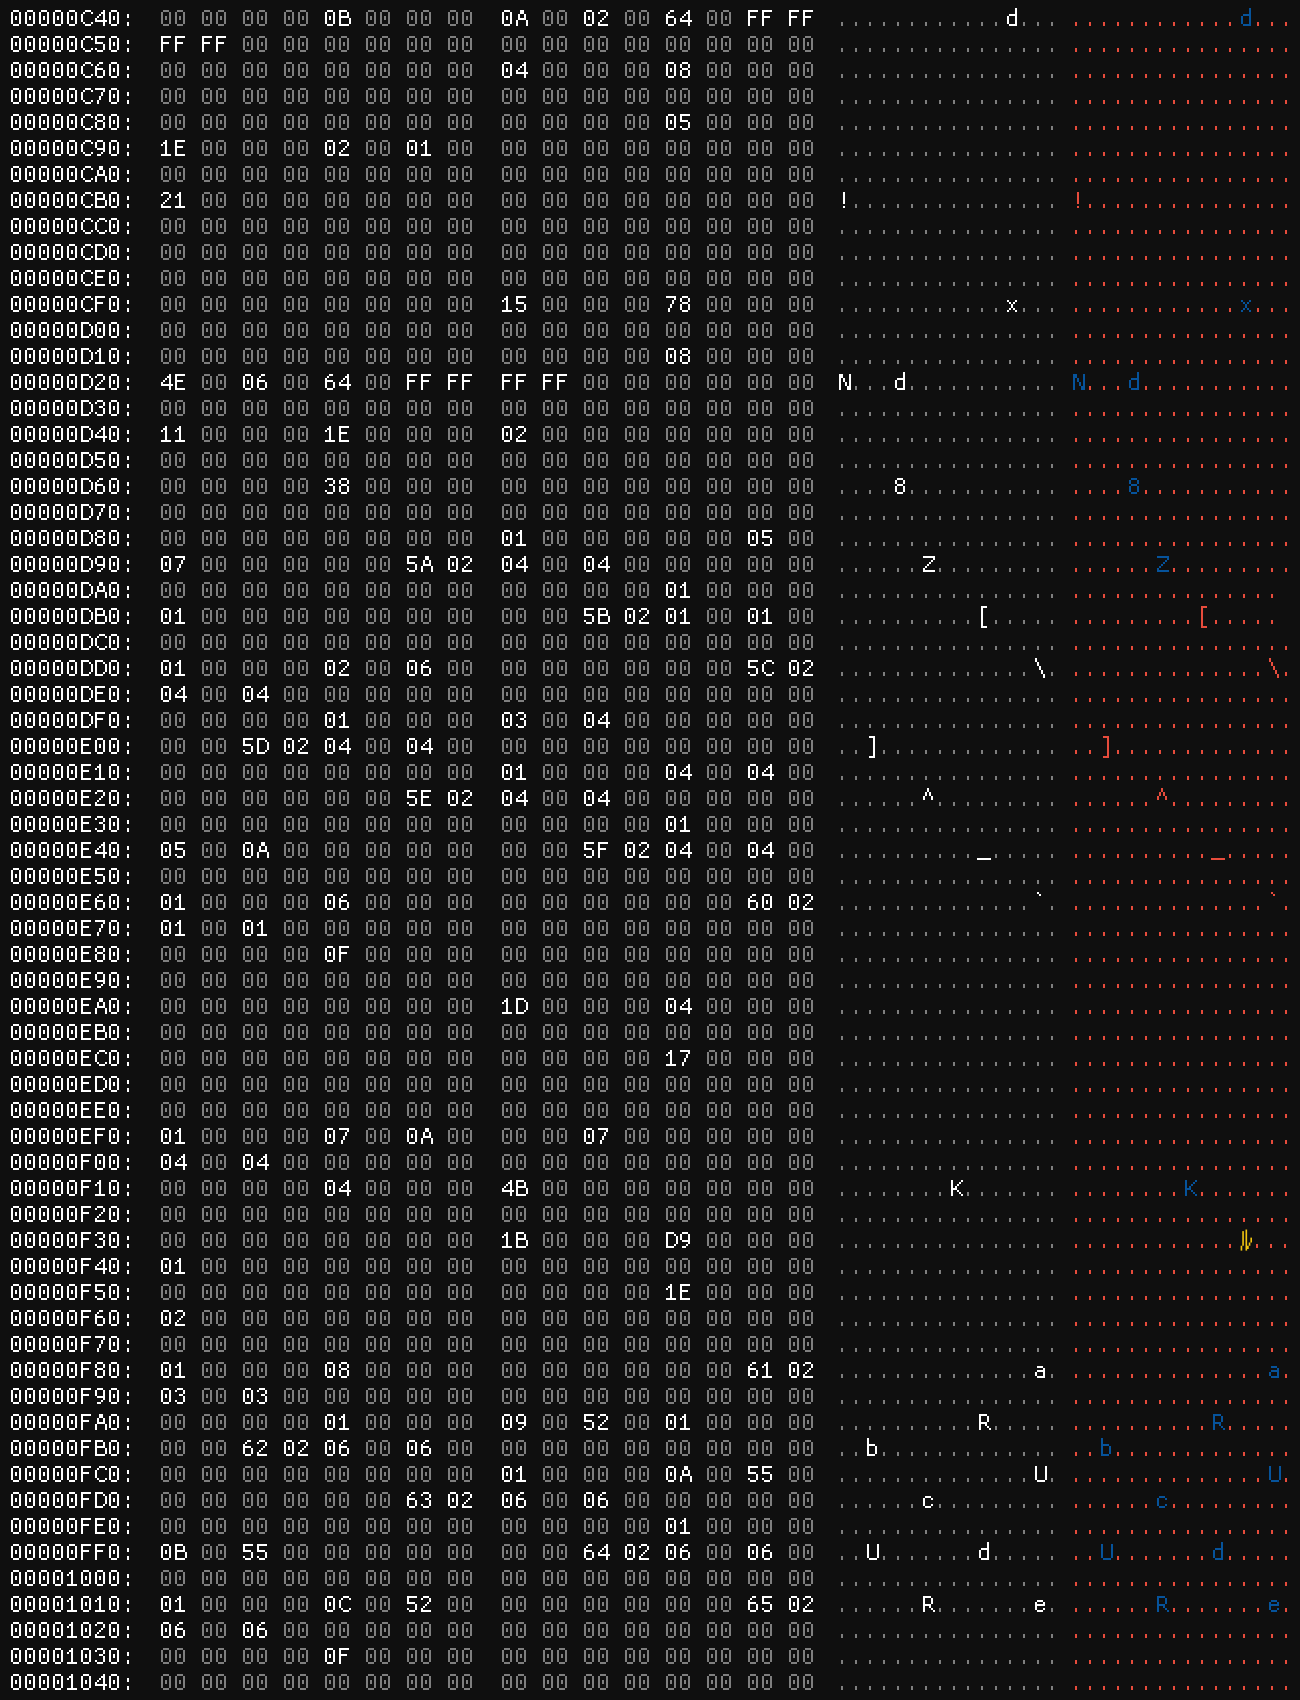
Now that we’ve figured that out, let’s follow the lead on those EndPointers. Let’s put them in a table and see what they point to!
| End Pointer | Value |
|---|---|
| 0xF4 | 0xEC |
| 0x114 | 0x108 |
| 0x138 | 0x128 |
| 0x15C | 0x14C |
| 0x190 | 0x1AC |
| 0x1D0 | 0x1BC |
| 0x240 | 0x20C |
| 0x244 | 0x47C |
What do all these have in common? These are all pointers! The end pointers all point to pointers – and in fact, if we were to go through them, they point to every pointer in the file. In other words, every pointer in the file after the front pointers has its offset stored here in the end pointers. This is going to be extremely helpful further down the line.
Testing Time
Around this time, historically, I had cracked the archives, which allowed me to start reinserting these files for testing purposes. We had a couple of hypotheses that we came up with throughout our investigation, so now’s the time to test some of them.
First up, let’s take a look at the TitlePointer. Our hypothesis was that the third integer in the header points to the “title” of the file – but let’s open up another file to check.
Our third integer here is 0xA4, but at that offset, there’s nothing! It is, however, the first offset after the last integer of the FrontPointers. So maybe let’s rename it to DataStartPointer.
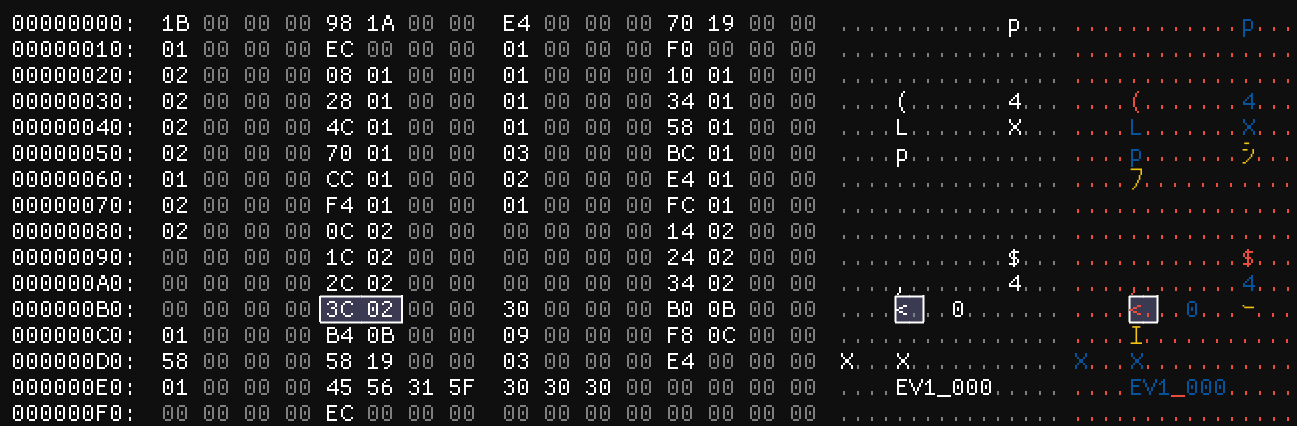
Secondly, let’s think about the dialogue lines. I mentioned that maybe those names we saw determined what was on the nameplates. So let’s try changing one from 長門 to “NG”. (Note here that we’re using full-width characters to match what the game expects – that’s why they show up in the Shift-JIS section below but not the ASCII section.)

And we load up the game…
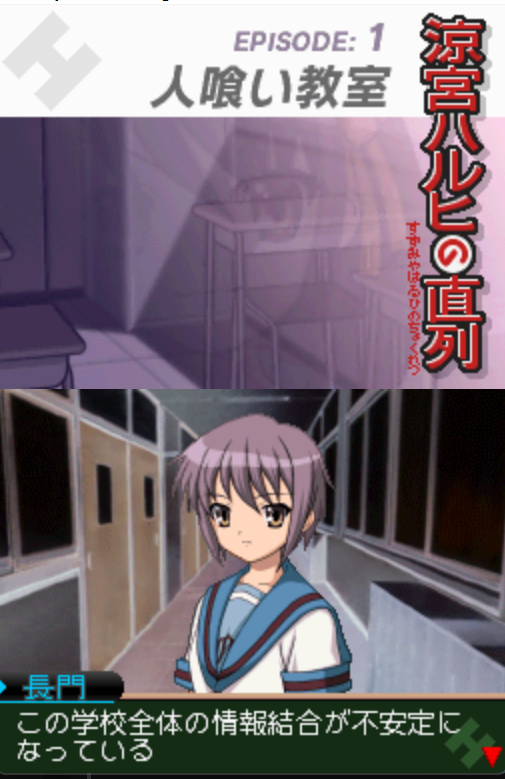
Nope, still 長門. Huh! It turns out, the nameplates are all images and not text, so I’m not really sure what these values are for. After several years of working on this game, my best guess is they were used by whatever script editors the devs used as an internal helper.
But let’s try changing the other thing – that first integer in the DialogueLine structure. Let’s change the first dialogue line’s from 0x02 to 0x03.

And we save that and load up the game…
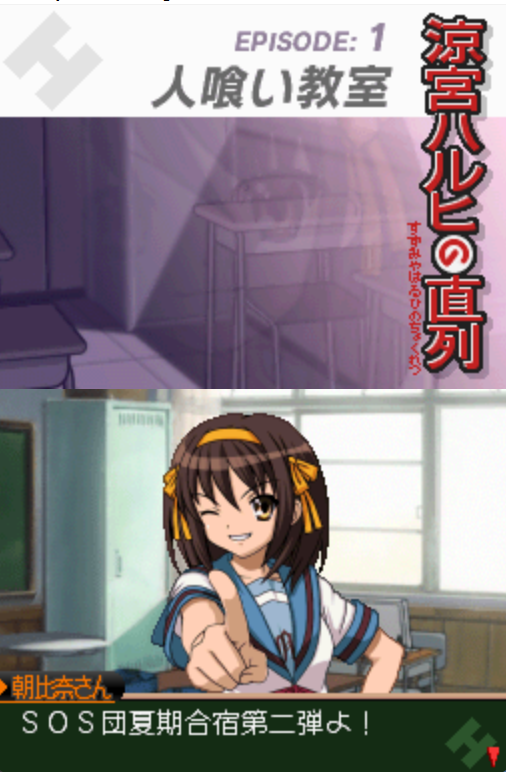
Look at that, the nameplate changed! That one says “Asahina-san”, so this integer determines the speaker. What’s more, since we can go in this way, we can change this number for every value from 0x01 through 0x18 and beyond to see what each different speaker is. If we do that, we can create an enum to represent the speakers for ease of use:
public enum SpeakerEnum
{
KYON = 0x01,
HARUHI = 0x02,
MIKURU = 0x03,
NAGATO = 0x04,
KOIZUMI = 0x05,
KYON_SIS = 0x06,
TSURUYA = 0x07,
TANIGUCHI = 0x08,
KUNIKIDA = 0x09,
CLUB_PRES = 0x0A,
CLUB_MEM_A = 0x0B,
CLUB_MEM_B = 0x0C,
CLUB_MEM_C = 0x0D,
CLUB_MEM_D = 0x0E,
OKABE = 0x0F,
BASEBALL_CAPTAIN = 0x10,
GROCER = 0x11,
GIRL = 0x12,
OLD_LADY = 0x13,
FAKE_HARUHI = 0x14,
STRAY_CAT = 0x15,
UNKNOWN = 0x16,
INFO = 0x17,
MONOLOGUE = 0x18,
MAIL = 0x19,
}
The Scientific Method
If you’ve ever been in a science class, you’ll notice that this process is essentially just the scientific method: create a hypothesis and then design an experiment to prove or disprove it. In a couple of cases above, we were able to disprove our hypotheses in ways that required revising them. We also managed to thoroughly confirm the speaker integer hypothesis and even gather a bunch of data. This is at the core of reverse-engineering data files. Investigation and looking for patterns in the hex editor will only get you so far – eventually, you have to crack open the game and see what happens as you start changing things.
To the End
Finally, it’s time to try to write something to modify this file. Let’s start by creating something basic: a representation of the file from what we know about so far.
First, let’s go back and update our DialogueLine structure and add a constructor for it:
public class DialogueLine
{
// Switching the speaker to the enum we defined before
public SpeakerEnum Speaker { get; set; }
public int SpeakerNamePointer { get; set; }
public int DialogueLinePointer { get; set; }
// We're going to add the strings (text) here for ease of access
public string SpeakerName { get; set; }
public string Dialogue { get; set; }
public DialogueLine(byte[] data)
{
Speaker = (SpeakerEnum)IO.ReadInt(data, 0x00);
SpeakerNamePointer = IO.ReadInt(data, 0x04);
DialogueLinePointer = IO.ReadInt(data, 0x08);
SpeakerName = IO.ReadShiftJisString(data, SpeakerNamePointer);
Dialogue = IO.ReadShiftJisString(data, DialogueLinePointer);
}
}
(Note: the IO methods are from a helper class I wrote here.)
Then we’ll use that to do the same for the event file as a whole
public class EventFile
{
// We start out with our representation of the first three values in the header
public int NumFrontPointers { get; set; }
public int EndPointersPointer { get; set; }
public int FileStartPointer { get; set; }
public List<byte> Data { get; set; }
// We're going to represent the "FrontPointers" in a list for now
public List<int> FrontPointers { get; set; } = [];
// And the end pointers in one as well
public List<int> EndPointers { get; set; } = [];
// Since the end pointers point to every pointer in the main section of the file, we can collate those here as well
public List<int> DataSectionPointers { get; set; } = [];
public List<DialogueLine> DialogueLines { get; set; } = [];
public EventFile(byte[] data)
{
NumFrontPointers = IO.ReadInt(data, 0x00);
EndPointersPointer = IO.ReadInt(data, 0x04);
FileStartPointer = IO.ReadInt(data, 0x08);
// We can loop through the front pointers and add them all here
for (int i = 0; i < NumFrontPointers; i++)
{
FrontPointers.Add(IO.ReadInt(data, 0x0C + i * 8));
}
// The first number in the end pointers was their count
int numEndPointers = IO.ReadInt(data, EndPointersPointer);
// We can loop using this as well
for (int i = 0; i < numEndPointers; i++)
{
EndPointers.Add(IO.ReadInt(data, EndPointersPointer + i * 4 + 0x04));
}
// Finally, we can loop through the data section using the end pointers
foreach (int endPointer in EndPointers)
{
DataSectionPointers.Add(IO.ReadInt(data, endPointer));
}
}
}
But how do we figure out which of the FrontPointers points to the dialogue lines? Turns out there is a trick for this, but I didn’t know what it was yet. So instead, I relied on a more brute force approach – looking across the files, it seemed like the dialogue section always started directly after the character names were listed. So, what if we just looped through the FrontPointers until we found those character names and then assumed the dialogue section came right after?
bool reachedCharacterNames = false;
for (int i = 0; i < FrontPointers.Count; i++)
{
uint pointerValue = IO.ReadUInt(data, FrontPointers[i]);
if (pointerValue > 0x10000000 || pointerValue == 0x8596) // 0x8596 is 妹 which is a valid character name, sadly lol
{
reachedCharacterNames = true;
}
else if (reachedCharacterNames)
{
DialogueSectionPointer = FrontPointers[i];
break;
}
}
Turns out this works well enough for what we want to do! Once we’ve found the DialogueSectionPointer, we can continue on to get all our DialogueLines:
int firstDialogueLineOffset = IO.ReadInt(data, DialogueSectionPointer + 0x08); // We know we've reached the end of the structures when the dialogue starts
for (int i = DialogueSectionPointer; i < firstDialogueLineOffset; i += 0x0C)
{
DialogueLines.Add(new(data.Skip(i).Take(0x0C)));
}
Simple as that! (The exact original coding monstrosity I wrote can be found here – it’s long since been refactored to something far superior, although much of the architecture for this code still relies on this original janky implementation.)
We can use this data alone to make a basic representation of the file, plug it into a (terrible) GUI, and end up with something like this:
Replacement and Repointing
So the entire goal here is to be able to edit the dialogue. To do that, we need to be able to change the length of the whole line. As we’ve seen though, there’s tons of pointers throughout the file. Adding to the middle of the file will throw off the entire thing, as all the pointers to offsets after the change will be pointing to the wrong places.
The solution here is simple: every time we adjust dialogue, also adjust all the pointers after that dialogue line to match the correct offsets. Since we have that list of end pointers with every pointer in the file, this is actually completely doable!
First, let’s add a quick parameter to the DialogueLine class that gets us a line’s length in bytes.
public class DialogueLine
{
public byte[] Data => Encoding.GetEncoding("Shift-JIS").GetBytes(Dialogue);
public int Length => Data.Length;
}
And then we’ll add a new method to our EventFile class for editing dialogue lines:
// We're using the index of the dialogue line here so we have a way of identifying them easily
public void EditDialogueLine(int index, string newText)
{
int oldLength = DialogueLines[index].Length;
// Remember, lines are 4-byte aligned, so we calculate that here:
oldLength = oldLength + (4 - (oldLength % 4));
DialogueLines[index].Text = newText;
int newLength = DialogueLines[index].Length;
newLength = newLength + (4 - (newLength % 4));
int lengthDifference = newLength - oldLength;
Data.RemoveRange(DialogueLines[index].DialogueLinePointer, oldLength); // Remove the old data
Data.InsertRange(DialogueLines[index].DialogueLinePointer, [.. DialogueLines[index].Data, .. new byte[4 - (DialogueLines[index].Length % 4)]]); // And insert the new data w/ padding
ShiftPointers(DialogueLines[index].DialogueLinePointer, lengthDifference);
}
And finally, let’s add that ShiftPointers method to handle actually shifting the pointers around!
public void ShiftPointers(int shiftLocation, int shiftAmount)
{
// Basically, this method just checks each pointer in the file to see if it's past the point where we shifted data around
// If it is, we offset it by the change in length and then replace the bytes in the file
if (EndPointersPointer > shiftLocation)
{
EndPointersPointer += shiftAmount;
Data.RemoveRange(0x04, 4);
Data.InsertRange(0x04, BitConverter.GetBytes(EndPointersPointer));
}
for (int i = 0; i < FrontPointers.Count; i++)
{
if (FrontPointers[i] > shiftLocation)
{
FrontPointers[i] += shiftAmount;
Data.RemoveRange(0x0C + i * 8, 4);
Data.InsertRange(0x0C + i * 8, BitConverter.GetBytes(FrontPointers[i]));
}
}
for (int i = 0; i < EndPointers.Count; i++)
{
if (EndPointers[i] > shiftLocation)
{
EndPointers[i] += shiftAmount;
Data.RemoveRange(EndPointersPointer + 0x04 * (i + 1), 4);
Data.InsertRange(EndPointersPointer + 0x04 * (i + 1), BitConverter.GetBytes(EndPointers[i]));
}
}
for (int i = 0; i < DataSectionPointers.Count; i++)
{
if (DataSectionPointers[i] > shiftLocation)
{
DataSectionPointers[i] += shiftLocation;
Data.RemoveRange(EndPointers[i], 4);
Data.InsertRange(EndPointers[i], BitConverter.GetBytes(DataSectionPointers[i]));
}
}
// We also do this on each DialogueLine as we'll need to make sure those are updated as we change each dialogue line in succession
foreach (DialogueLine dialogueLine in DialogueLines)
{
if (dialogueLine.DialogueLinePointer > shiftLocation)
{
dialogueLine.DialogueLinePointer += shiftAmount;
}
}
}
This definitely takes time and effort to make sure the code is doing exactly what we want, but just with what we’ve written so far – a very rudimentary understanding of the file since we don’t know the vast majority of what’s happening here – we’ll be able to fully replace dialogue in the game.
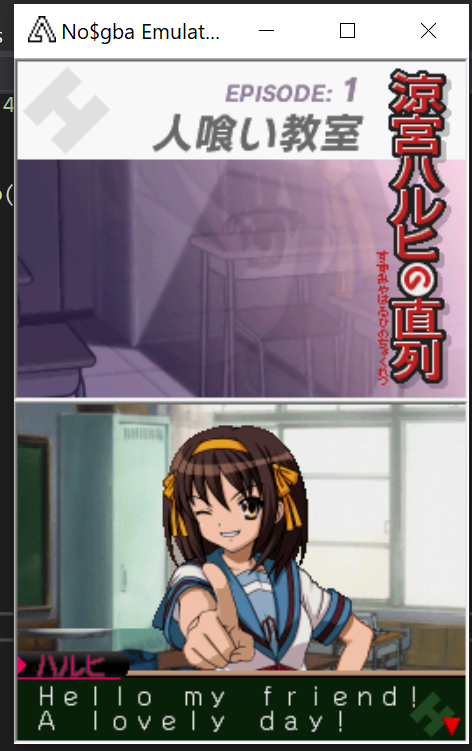
This image returns – the first text I edited into the game. 🥰
What’s Next
There’s still more to do with the event files! In future posts, I’ll explain how we automated our translation flow for these (and other) files, as well as dive deeper into reverse-engineering these files in order to have broader impact (the kinds of things you’d have to do if, for example, you were writing a full editor for a game). What’s more, if you look closely at the image above, you’ll notice the font is way too large to fit our translated text in the textbox, which means we’ll soon have to contend with our greatest challenge yet – editing the game’s code to change the width of the font! Thanks for reading and please look forward to future entries in this series!